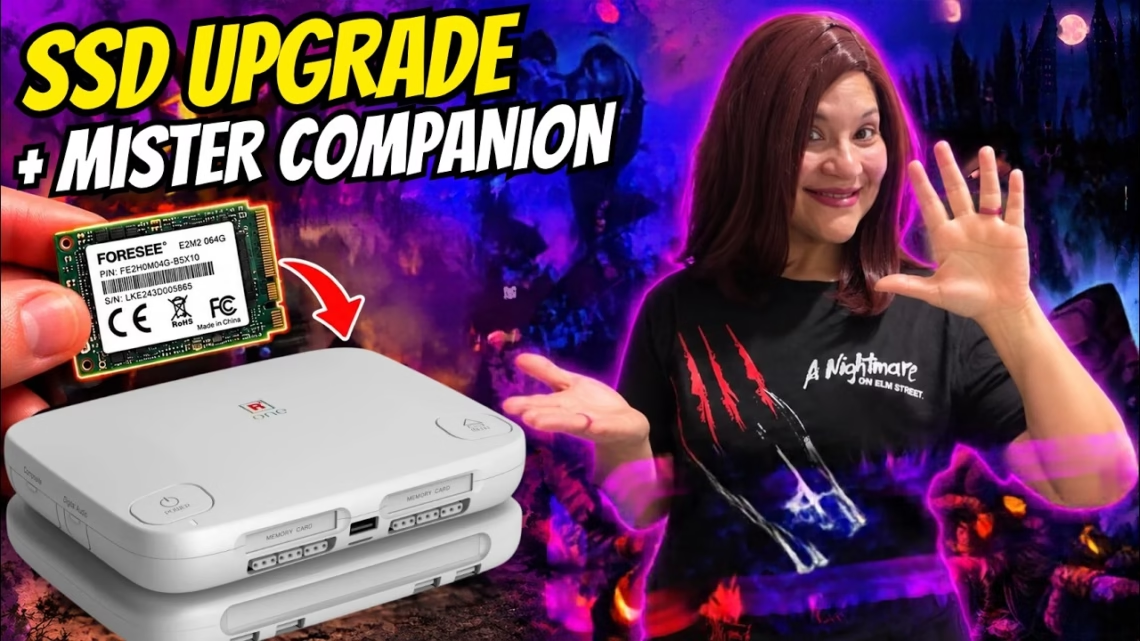
Halloween was around the corner, so we gave our SuperStation One a double feature. One viewer asked how to set up M.2 storage in the SuperDock, and another asked us to cover MiSTer Companion, so we combined both into one guide. First we added an SSD to the SuperDock for extra game storage and managed it with MiSTer Companion. Then we loaded it with five classic PlayStation horror games.
We didn’t buy anything for this upgrade. We reused the original SSD from our Steam Deck, which had been sitting in a drawer since we upgraded it. If you’ve done the same, you may already own everything you need.
Not sponsored. We bought the SuperStation One with our own money, and the SSD was already ours.
What you’ll need
- A SuperStation One with the SuperDock
- An M.2 SSD (ours is the 64GB 2230 drive from a Steam Deck)
- A computer on the same network as your SuperStation One, with MiSTer Companion installed
- A USB NVMe enclosure, to format the SSD on your computer
- Your PlayStation BIOS file and legally obtained game backups
Step 1: Format the SSD on your computer
Before the SSD goes near the SuperDock, format it. Our drive had been through a few projects, and the first time we tried this we skipped the step. It came back to bite us, as Step 5 explains.
On a Mac, put the SSD in a USB NVMe enclosure, plug it in and open Disk Utility.
- Choose View > Show All Devices. By default Disk Utility only shows volumes, and you want the whole physical drive.
- Select the top-level drive, not the volume under it.
- Click Erase, pick exFAT for the format and Master Boot Record for the scheme, and give it a name (we used SSO_EXT).
- Click Erase again and let it finish.
- Eject the drive and take it out of the enclosure.
Formatting erases everything on the drive. Make sure you’ve selected the correct drive and back up anything you care about first. On Windows you can do the same thing in Disk Management.
Step 2: Install the SSD in the SuperDock
The M.2 slot is in the SuperDock, the expansion that adds the disc drive. Without the dock, the console stores games on microSD or USB. The slot is a full-size 2280, but you can move the mounting piece to fit shorter drives such as the Steam Deck’s 2230.
The 64GB Steam Deck actually shipped with eMMC storage, which is slower, cheaper flash than a regular NVMe drive. It has a controller that lets it talk to the system like an NVMe drive, which is why the SuperDock recognised it without trouble. For PS1 games the speed difference doesn’t matter.
To reach the slot you have to remove the cover, and this is the part we like least. It’s tight and it feels like something is about to snap. It does come off, so be patient: work around the edge slowly, and if you hear cracking, stop and try a different spot.
- Find the small black mounting piece inside the bay.
- Move it to the position that matches your SSD length (2230, 2242, 2280).
- Slide the SSD into the connector at a slight angle.
- Press it down flat and lock it in with the mounting piece.
- Put the cover back on and power up the SuperStation One.
The install took about two minutes, most of it fighting the cover.
Step 3: Connect with MiSTer Companion
MiSTer Companion lets you manage your MiSTer system from your computer over your home network, so there’s no more pulling out SD cards or drives to add a game or change a setting.
- Make sure the SuperStation One and your computer are on the same network.
- Find the SuperStation One’s IP address in its settings.
- Open MiSTer Companion and enter that IP address.
Once connected, it can do much more than manage storage: remote control, screenshots, file management, MiSTer settings, some homebrew installs, save backups, system statistics and running Update All. We stick to storage in this guide.
Step 4: Check the SSD in MiSTer Companion
Open the Storage section. Your new SSD should appear as external storage. Note that MiSTer Companion’s Flash SD tool is for creating a fresh MiSTer boot SD card, not for formatting a game drive, so don’t point it at your SSD. That’s why we formatted it on the computer in Step 1.
Step 5: How MiSTer sees external storage
When you connect a drive, Linux gives it a mount point. Your SSD will usually appear as /media/usb0, but it can also show up as /media/usb1 or higher. Think of parking spots: the first drive found gets spot zero, and if something else grabs it first, your SSD moves to the next one.
The problem we hit: a leftover Ventoy partition
The first time we tried this, before formatting, our SSD still had an old Ventoy partition from a previous project. MiSTer saw that tiny partition as its own drive. When we ran Update All through MiSTer Companion it complained about not enough free space on an SSD with plenty of room, because Update All was using the leftover partition, which was only 32 MB.
The fix: if you get a “not enough space” error on a big drive, check whether it has more than one partition. Once we deleted the extra one, the SSD showed up as usb0 with all its space and Update All ran fine. As with formatting, double-check before you delete a partition.
Step 6: Add your PlayStation games
MiSTer looks for games in one folder per core. For PlayStation, games go in /media/usb0/games/PSX, with each game in its own subfolder:
/media/usb0/games/PSX/boot.rom and /media/usb0/games/PSX/Resident Evil (USA)/ containing the .cue and .bin files.
- BIN is the game data.
- CUE is a table of contents that tells the system how the disc is laid out. When you load a game, select the CUE file.
- CHD is a compressed alternative that saves space and also works with the PSX core.
For multi-disc games, keep every disc together in that game’s folder.
Don’t forget the BIOS
Once MiSTer finds a PSX folder on your SSD, it uses that folder instead of the one on the SD card. Your PlayStation BIOS file, boot.rom, has to be in the SSD’s PSX folder too, or your games won’t boot. Japanese or European BIOS files go in the same folder as boot1.rom and boot2.rom. MiSTer Companion can copy all of this over the network, so you never have to take the SSD out.
As always, use games and BIOS files you’ve legally obtained.
5 PlayStation horror games to play this Halloween
1. Resident Evil (1996)
The game that defined survival horror. You’re trapped in a mansion full of zombies, monsters and puzzles with barely enough ammo, so every enemy is a decision: fight, run, or save your bullets for something worse. The fixed camera angles make every new room feel dangerous.
2. Dino Crisis (1999)
From the team behind Resident Evil, with dinosaurs instead of zombies. You play Regina, a special agent investigating a research facility that has gone very wrong. The dinosaurs are fast and loud, and the jump scares work. A good pick if you want a bit more action.
3. Clock Tower (1997)
No weapons at all. You hide, you run, and you hope Scissorman doesn’t find you. Not being able to fight back is what makes it so effective, and it’s great with friends watching.
4. Resident Evil 2 (1998)
The mansion is behind you and Raccoon City is much worse. Play as Leon Kennedy or Claire Redfield, each with their own path through the outbreak and the police station. It takes everything the original did well and makes it bigger.
5. Silent Hill (1999)
The creepiest of the bunch. Silent Hill builds dread with fog, radio static whenever something is close, unsettling music and a town that feels wrong. You’re searching for your missing daughter, and the deeper you go the less sense anything makes. If you only play one game on this list, make it this one.
Final thoughts
Reusing an old Steam Deck SSD was a free, easy way to expand the SuperStation One’s storage through the SuperDock. Our one real complaint is the cover, which is harder to remove than it should be. But expandable storage is convenient, and MiSTer Companion makes managing it much easier.
Pros
- The SuperDock’s M.2 slot fits several sizes, including 2230 drives from handhelds, and it worked with the Steam Deck’s 64GB eMMC drive
- MiSTer Companion handles drive checks, updates and file transfers over the network
- A great way to reuse an SSD you already own
Cons
- The SuperDock’s SSD cover is tight and nerve-racking to remove
- Leftover partitions on reused drives can confuse Update All
- BIOS files need to be copied to the SSD’s PSX folder, not just the SD card
Frequently asked questions
Why does my SSD show up as usb1 instead of usb0?
Another drive or partition grabbed usb0 first. Check for leftover partitions on your SSD, such as an old Ventoy partition, and for other connected USB storage.
Why does Update All say there isn’t enough space on a big SSD?
It may be targeting a tiny extra partition instead of the main one. Carefully remove the extra partition and the SSD should mount with its full space.
Why won’t my PS1 games boot from the SSD?
Most often the BIOS is missing. Copy boot.rom into /media/usb0/games/PSX, because MiSTer stops checking the SD card’s PSX folder once it finds one on the SSD.
Should I use BIN/CUE or CHD?
Both work. BIN/CUE is the most common format, and CHD saves space by compressing the game.
What’s your favourite PlayStation horror game? Let us know in the comments on the video. If you’re new to the SuperStation One, start with our setup guide on installing Console Mode the right way. Thanks to @JDLopes82 and @chrisshaw451 for the suggestions.